Installing the Node
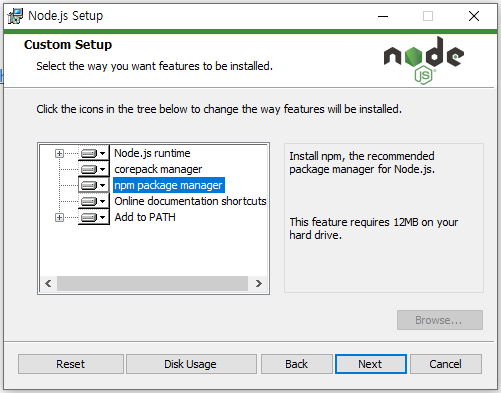
우선 Node를 설치한다.
설치파일 다운로드 경로 : https://nodejs.org/en/
vue 설치에 필요한 npm package manager가 포함되어 있다.

npm으로 cli tools을 설치할 때, globally 하게 설치하여 어디서든 접근 가능하도록 할 수도 있고, locally 하게 설치하여 현재 프로젝트 directory에만 적용할 수도 있다. globally하게 설치하는 것에는 장단점이 있으니, 상황에 맞게 설치해야 한다.
cmd창에서 node 설치 확인
C:\Users\admin> node -v
v16.13.1
기본 vue 개발 환경을 설정해주는 Vue CLI(Command line interface)를 설치해보자.
C:\Users\admin>npm install -g @vue/cliAdding the Vue.js Project
이제 ASP.NET MVC Project 위치에서 cmd 창을 열고 Vue.js project를 생성한다.
C:\Users\admin\source\repos\VUE\VUE>vue create vuejs

✨  Creating project in C:\Users\admin\source\repos\VUE\VUE\vuejs.

added 55 packages, and audited 1333 packages in 5s

📄  Generating README.md...

🎉  Successfully created project vuejs.
👉  Get started with the following commands:

 $ cd vuejs
 $ npm run serve
cd vuejs
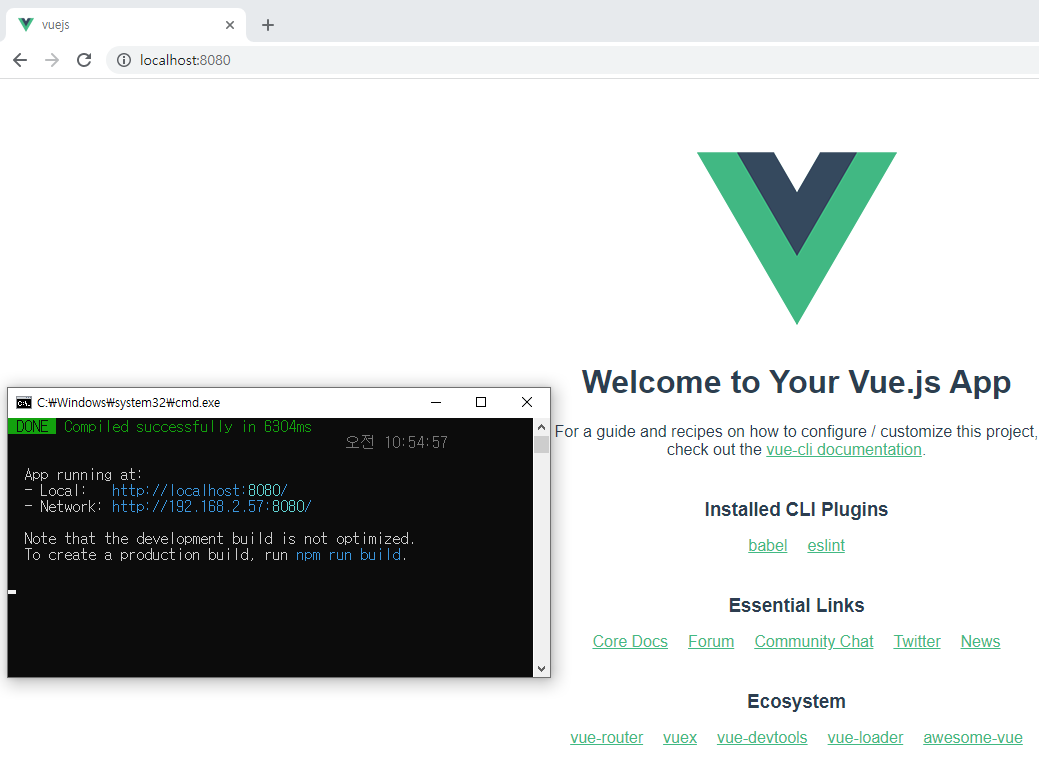
npm run serve 하고 브라우저에서 localhost:8080 으로 접속하면 Vue.js의 기본 화면을 볼 수 있다.


솔루션 탐색기에서 vuejs 폴더가 생성된 것을 확인할 수 있다.
vuejs 하위의 node_modules 폴더 우측클릭하여 프로젝트에 포함하지 말자. 용량이 커서 에러난다.
이제 ASP.NET MVC solution에 Vue.js 프로젝트 추가가 완료 되었다.
다음으로 Vuejs components를 생성하여, ASP.NET MVC view에서 사용해보자.
Creating the Example Feature1 and Feature2 Vue.js Components
public 폴더에 featuerTest1.html, featuerTest2.html을 추가한다.
<!-- public/featureTest1.html -->
<!DOCTYPE html>
<html lang="en">
<head>
    <meta charset="utf-8">
    <meta http-equiv="X-UA-Compatible" content="IE=edge">
    <meta name="viewport" content="width=device-width,initial-scale=1.0">
    <title>Test Feature1</title>
</head>
<body>
    <noscript>
        <strong>We're sorry but vuejs_src doesn't work properly without JavaScript enabled. Please enable it to continue.</strong>
    </noscript>
    <div id="f1App"></div>
</body>
</html>
src 폴더에 Feature1.vue, Feature2.vue, f1.js, f2.js 파일을 추가한다.
// vuejs/src/Feature1.vue
<template>
    <p>
        Hello from Feature 1
    </p>
</template>

<script>
</script>

<style>
</style>
// vuejs/src/f1.js
import Vue from 'vue'
import F1 from './Feature1.vue'
Vue.config.productionTip = false
new Vue({
render: h => h(F1),
}).$mount('#f1App')Vue.js는 project를 빌드할 때, public/index.html 파일을 template으로 사용한다. 생성한 templates를 사용하기 위해서는 configuration file이 필요하다.
vue.config.js 파일을 추가한다.
//vuejs/vue.config.js
module.exports = {
    pages: {
        feature1: {
            entry: 'src/f1.js',
            template: 'public/featureTest1.html',
            filename: 'index.html',
            title: 'Feature 1',
            chunks: ['chunk-vendors', 'chunk-common', 'feature1']
        },
        feature2: {
            entry: 'src/f2.js',
            template: 'public/featureTest2.html',
            filename: 'index2.html',
            title: 'Feature 2',
            chunks: ['chunk-vendors', 'chunk-common', 'feature2']
        }
    }
}
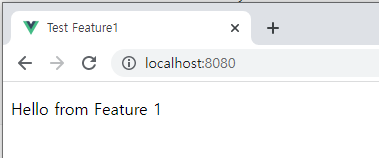
다시 서버를 실행하면 아래와 같이 보인다.

Setting up Mode 3 (or Integrate the Production Versions of Feature1 and Feature2 in ASP.NET MVC View)
ASP.NET MVC View에서 Feature1, 2를 표기하기 위해서는 vue.config.js 파일에 몇가지 options을 추가해야 한다.
//vuejs/vue.config.js
module.exports = {
    filenameHashing: false,
    productionSourceMap: false,
    outputDir: '../wwwroot/dist',
    configureWebpack: {
        devtool: 'source-map',
        output: {
            filename: '[name].js'
        }
    },
    pages: {
        feature1: {
            entry: 'src/f1.js',
            template: 'public/featureTest1.html',
            filename: 'index.html',
            title: 'Feature 1',
            chunks: ['chunk-vendors', 'chunk-common', 'feature1']
        },
        feature2: {
            entry: 'src/f2.js',
            template: 'public/featureTest2.html',
            filename: 'index2.html',
            title: 'Feature 2',
            chunks: ['chunk-vendors', 'chunk-common', 'feature2']
        }
    }
}- filenameHashing : template이 index.html이 아닌경우에는 filenameHashing을 사용하지 않는다.
이제 component를 빌드해보자.
C:\Users\admin\source\repos\VUE\VUE\vuejs>npm run buildvisual studio 패키지 관리자 콘솔에서도 가능하다.
PM> cd VUE
PM> cd vuejs
PM> npm run build
이제 ASP.NET MVC view file로 가서 featuer1, 2를 추가해보자.
@{
    Layout = null;
}

<!DOCTYPE html>

<html>
<head>
    <meta name="viewport" content="width=device-width" />
    <title>ASP.NET MVC  and Vue.js Integration</title>

</head>
<body>
    <h1>ASP.NET MVC  and Vue.js Integration</h1>

    <noscript><strong>We're sorry but vuejs_src doesn't work properly without JavaScript enabled. Please enable it to continue.</strong></noscript>

    <div id=f1App></div>
    <div id=f2App></div>


    <script src="~/dist/feature1.js"></script>
    <script src="~/dist/feature2.js"></script>
    <script src="~/dist/js/chunk-vendors.js"></script>

</body>
</html>
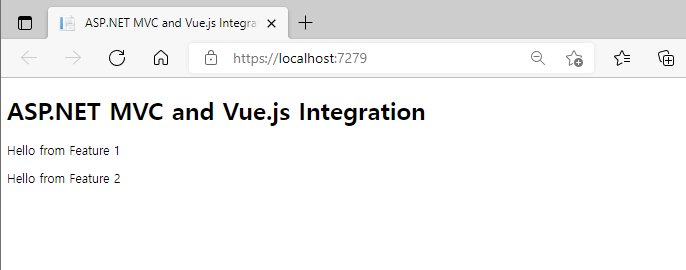
MVC 프로젝트를 디버깅 하면, 다음과 같이 표시된다.

'ASP.NET MVC' 카테고리의 다른 글
| ASP.NET MVC] Sub Select Option 동적 변경 (1) | 2022.05.27 |
|---|---|
| ASP.NET MVC] Response.ContentType을 사용한 엑셀 다운로드 (1) | 2022.05.27 |
| ASP.NET MVC] Vue.js 로 CRUD 구현 (0) | 2022.01.06 |
| ASP.NET MVC 4] 종속성 주입 (Dependency Injection) (0) | 2022.01.03 |
| Visual Studio 2019] 디버깅 팁, Debugger Tips (1) | 2021.12.23 |


댓글